Sunday, July 24, 2011

Another day, another post

I have today off from work and have done some house cleaning and such. Now I'm just relaxing because I don't feel like doing anything else.
So I figured while I sit around doing nothing I could at least be busy doing something... So Blogging it is...

In my last post I said I would take more pictures of my Totoro cream puffs.. Well that didn't happen. My DARLING husband just happened to eat the perfect ones that I was saving for my pictures so I just ate them and gave some to my friend at work instead... Sorry about that, but you know who to blame... I'll at least post the recipe!

Pate Choux!

Pierre Hermé’s Chocolate Éclairs
Recipe from Chocolate Desserts by Pierre Hermé

Choux Pastry
1/2 cup (125g) whole milk
1/2 cup (125g) water
1 stick (4 ounces; 115g) unsalted butter, cut into 8 pieces
1/4 teaspoon sugar
1/4 teaspoon salt
1 cup (140g) all-purpose flour
5 large eggs, at room temperature

Preheat your oven to 375 degrees F. Line 2 sheet pans with parchment paper. Prepare a pastry bag with a medium sized plain tip.
In a medium sauce pan, bring the milk, water, butter, salt and sugar to a boil.
Add the flour all at once and lower to medium heat and stir vigorously until it's smooth and seems a little dry. About 2-3 minutes.(It kind of reminds me of over cooking cream of wheat or something........)

Transfer into a mixing bowl onto your mixer with a paddle attachment. Add one egg at a time making sure to blend completely before adding the next. The dough should be thick, shiny and silky looking, like a ribbon.

Put into your pastry bag and pipe Totoros. Basically start at the bottom and pipe a little larger than a quarter size round then slowly bring it up to make the head about a nickle size. Squeeze a little out for ears. Continue until all the dough is used up. You can also make regular eclairs or cream puffs by piping about a 4" line or a dollar coin size round. Leave about 2 inches between each.
If you have little pointy parts sticking up and out wet your finger a bit and just push or smooth it out, otherwise they will burn.

Bake for 25-30 minutes until brown and crisp.
Let cool completely.

Chocolate Pastry Cream.(YUMMMMM! I love pastry cream! *swoon*)

2 cups (500g) whole milk
4 large egg yolks
6 tbsp (75g) sugar
3 tablespoons cornstarch, sifted
7 oz (200g) bittersweet chocolate, melted
2 1/2 tbsp (1¼ oz: 40g) unsalted butter, at room temperature

In a medium sauce pan bring milk to a boil. In the mean time combine yolks, sugar and starch and whisk right away in a bowl.

Once the milk has reached a boil, temper the yolks by whisking a couple spoonfuls of the hot milk into the yolk mixture. Tempering the eggs raises the temperature of the eggs slowly so that they do not scramble.
Continue whisking and slowly pour the rest of the milk into the tempered yolk mixture.
Strain the mixture back into the saucepan to remove any egg that may have scrambled. Place the pan over medium heat and whisk vigorously (without stop) until the mixture returns to a boil. Keep whisking vigorously for 1 to 2 more minutes (still over medium heat).Stir in the melted chocolate and then remove the pan from the heat.

Scrape the pastry cream into a small bowl and set it in an ice‐water bath to stop the cooking process. Make sure to continue stirring the mixture at this point so that it remains smooth.

Once the cream has reached a temperature of 140 F remove from the ice‐water bath and stir in the butter in three or four installments. Return the cream to the ice‐water bath to continue cooling, stirring occasionally, until it has completely cooled. The cream is now ready to use or store in the fridge. The pastry cream can be made 2 - 3 days in advance and stored in the refrigerator. In order to avoid a skin forming on the pastry cream, cover with plastic wrap pressed onto the cream.

Now that you have all the stuff prepared you can start decorating and filling the cream puffs!

I found it easier to slice the cream puffs right in half horizontally, then decorate the tops and then fill them.
So for Totoro you need some white chocolate and dark chocolate to make little faces.
Here's Totoro!

And again, here's what mine look like(not so great)

But you get the idea. You can dip some in chocolate first and then add the eyes if you want some extra chocolatey yumminess.
You can let the chocolate harden in the fridge for a few minutes and then fill a pastry bag with pastry cream and squeeze it on the bottom halves of the cream puffs and place the tops on.

DONE!
Enjoy!

Tuesday, July 19, 2011

I really have been busy! I swear!

So I really have been busy! And tired... Especially now that I'm pregnant! So far I'm 24 weeks into it! We're having a little boy and most likely naming him Irbie! So excited to meet this little fellow! I have been slowly gathering baby stuff from people and soon will be ready to set up the nursery! It will be a fun little project. I'm signed up for baby registry and should be having a baby shower soon!

Also, I have been making lots of random foods and taking pictures, just not adding them to my blog.... Which is bad on my part, since I started my blog to share food I've created with all of you!

I am going to up load some stuff today that I've made(and other photos...) in the past few months since I haven't been sharing..... Okay! GO!

First here are some salmon berries that I found on my way to work. Just thought they are pretty so I took a picture....then ate them ^_^

Here is my first strawberry from my garden this year! It was sooo yummy! More have followed but haven't stuck around long enough to model.


I tried my hand at making bento and was sooo excited to have a kawaii(Japanese for "cute") lunch! And some for James too! The first two were his, and the other two were mine...


As you can see I'm still a newbie at making bentos. But today I just bought some new bento boxes and also cute little bottles for sauces and things like that. So new bentos will be on the way! Also I've been reading Anna the Red's Bento blog and have really been enjoying it and getting details!
AnnaTheRed
I also got my Totoro cream puff idea from her!!! I'll be posting pictures and recipe later! Here's one picture, but I made two trays and the other one turned out better, I just haven't taken a picture yet... So here's this for now!


So that's it for now. I will be posting more later!
Enjoy!

Tuesday, May 31, 2011

Thanks-for-getting-me-a-piano Apple Pie!

My darling husband got me a piano yesterday! I've been playing since I was 7 years old, and haven't had a piano since I was 18. It's something I've always loved to play and enjoyed, even though I'm extremely piano shy and have a hard time playing if people are around.
Regardless, I have one now and love it! It's old and worn, but it still plays well, and I want to paint flowers on it.
So how does one thank a loving man? With a pie of course! Here's the recipe for this yummy thank you pie! The crust is from Martha Stewart, but it turns out really nice and flaky like a good crust should! Mmmmm. <3


Crust: Makes 1 double-crust or two 9" crusts.
Pate Brisee
2 1/2 cups all-purpose flour
1 teaspoon salt
1 cup cold (2 sticks) unsalted butter, cut into 1/2-inch pieces
1/4 to 1/2 cup ice water

Directions:
Pulse flour and salt in a food processor. Add butter, and pulse until mixture forms coarse crumbs with some larger pieces remaining, about 10 seconds.

With machine running, add ice water in a slow, steady stream just until dough holds together without being wet or sticky, no longer than 30 seconds.

Divide into two equal pieces. Roll one out and fit into a pie dish, freeze for 30 minutes until firm.
Shape the second piece into a disk and wrap in plastic and refrigerate for 30 minutes.

Filling:
3lbs Granny Smith apples, peeled, cored, sliced into 1/4"
1/2 C. Granulated sugar
1/4 C. Brown Sugar
2 Tblsp Flour
2 Tblsp. Lemon juice
1/2 tsp. Cinnamon
1/4 tsp. nutmeg
1/4 C. unsalted butter, cut into pieces
2 Tblsp. Bread crumbs or graham cracker crumbs

Egg wash:
1 egg yolk
1-2 Tbsp Heavy cream or milk
Whisk together

Preheat oven to 375*F

Place all the ingredients except for butter and crumbs into a large bowl and toss until evenly coated.
Sprinkle the crumbs evenly into prepared pie shell.
Pour the filling into the shell, spreading it around evenly. Dot with butter.
Roll out the top crust and place on top of the pie. Cut off some of the extra edges. Save the trimmings. Fold the edges under and press into the bottom crust and make some fluted edges or crimp with a fork or however you wish.
With a paring knife make some vents(You can cut out a little design before you put the top crust on if you wish).
Roll out the remaining crust and use cute cookie cutters to add a little flare to your pie.

Egg wash the pie and place cutouts wherever desired. Egg was cut outs and sprinkle with sugar.
Place foil around the edges of your pie crust so it doesn't burn. It doesn't need to be on tight, just place it on top.
Bake for 40 minutes with the foil on.
Bake for another 20-30 minutes with the foil off.
The crust should be a nice golden brown and the pie should be smelling amazing!!!

Let cool, and top with vanilla ice cream!
Eat and enjoy!

Tuesday, February 8, 2011

Ode to the Onion.

I wrote this because I don't think that onions get enough credit.....


Oh Onion, without you, my culinary talents would be nothing.
You have powers that are magnificent.
Without you, my dishes lack everything.

When cooked so slowly,
you become,
oh so sweet and caramely.

But when I get a hold of you, and start to slice or chop away,
You always bring tears to my eyes,
like no other you bring the burning, stinging and pain.

But oh, dear Onion, How I love you.
When I get your tender flesh inside the pan,
you work your magic wonder and I know I'll use you again.

So Onion, you're so sweet, yet so mean.
I want to thank you for doing your amazing thing.

Tuesday, December 28, 2010

Sorry for the delay!

I'm so sorry for not updating this in sooo many months!!! There are so many things in life that take my attention away from this(and other things) that I can't even keep track of what is going on!

I got married on October 16th! It was a beautiful day and everything turned out perfect! Here are a few pictures!
My amazing family! Thank you all for being there! I love you guys!

Me and my husband!

I made upside down blackberry apple ginger bread cake. I got the recipe from this blog: http://www.eating-sf.com/2010/07/nectarine-raspberry-upside-down.html
But I switched the fruit to what was cheaper in October. It was soo yummy.


And I made individual marbled cheesecakes. I kind of put a couple recipes together to get what I wanted.....


I guess life has just thrown other things at me. I started working at a new job, and like it WAY better than my old one. It's a local grocery store. I work in the bakery area, And although I'm not actually doing any baking, just stocking and dating and stuff. But everyone is super friendly and it will work for the time being.

One of my friends took a web design class and asked if she could make me a website for my little business that I want to start! She did such a great job! It's not online yet, we will be figure that out in the next few months or so and working out all the kinks and such. Here's a direct link!
http://edison.seattlecentral.edu/~dpham004/web110/a7/aboutme.html

I think I will be doing my blog a little differently at times. I guess I find it hard to take pictures step-by-step. So instead maybe I will just put a picture of the finished project and maybe one or two other photos if possible!
Let me know how you like it!

Here's some Rye bread that I made today! It's a recipe from my grandma and I haven't made it in forever. It's soooo yummy. I really enjoy it!


2 C. Rye flour
1 C. Whole wheat flour
1 TBSP. Yeast
5 C. Unbleached white flour
1 1/2 TBSP salt
3 c. Warm water

Put the yeas in a small about of warm water. Add a little honey or sugar.
Mix flours and make a well for yeast. Put the yeast in the well and mix in a small amount of flour. Let rise.

Add water and salt and mix. Turn onto a floured surface and knead until smooth. About 7 minutes. Put into a greased bowl. Cover and let rise until doubled.
Shape into a loaf(I made a big and little one). Let rise 30-40 minutes.
Preheat oven(with a baking stone or an overturned baking sheet, and a pan filled with water) to 425*F. Score bread.
Bake 50 minutes(I took my little one out about 35-40 minutes)

Wednesday, June 23, 2010

Oatmeal Pancakes with Huckleberry Compote!

Well I finally found the pictures that I took when I made these yummy pancakes!(and they are pretty healthy too!!) Sorry for the lack of post. But I have a couple that I will put up today!

Pancakes:
1 cup Flour(can use white or whole wheat)
1/2 cup Wheat Germ
1/2 cup Rolled Oats (not instant)
1 TBLSP. Baking Powder
1 TBLSP Cinnamon
1 tsp. Salt
1/4 tsp Allspice
1/4 cup White or Brown Sugar
2 Eggs
2 cups Milk
1 tsp Vanilla
1/3 cup Oil (I use half oil and half applesauce, or you can use all applesauce)

Sift all dry (except oats) into a large bowl.


In a smaller bowl whisk the eggs, milk and oil(applesauce) until well beaten. Add the oats and let sit about 10 minutes to soften.


Meanwhile, make the compote!
2 cups fresh or frozen Huckleberries(or any other berries)
1/4 cup Brown Sugar
1 TBLSP Cornstarch
1/2-1 tsp Lemon or Orange Zest

Add all ingredients to a saucepan and cook on med-low, stirring frequently until thick.


Now pour the wet ingredients into the dry and mix until just blended.


Heat a small skillet on medium/medium-high with a little butter. Pour enough batter(bout 1/2-1 cup) into the pan to cover the bottom.


You know it's time to flip it when it gets bubbles on top!


Use a spatula to slowly loosen the edges. And with a flick of the wrist, turn it around(Takes a lot of practice!)
Stack on a plate and keep warm in the oven until all pancakes are made.
Top with the lovely huckleberry compote and add a pretty flower.


Eat and enjoy!

Sunday, June 6, 2010

Sushi!

Sadly I haven't updated anything lately. I have made some things and just don't feel like taking pictures or am just too tired! Also, the computer I am using from a friend doesn't like to work with the memory card from the camera.
I made oatmeal pancakes with huckleberry compote and took some pictures, but now I have to locate that memory card!

In other news, I have order business cards for my home baking business that I plan on starting. It is going to be called "Pixie's Pastry Parlor". I am excited to get it up and running. Although I still have a lot of work to do!

Well for this entry I made sushi!
(This is for the sushi rice, I cut it in half because a full recipe is a LOT of rice and a LOT of sushi)

2 cups short grain rice ( I found so bamboo rice at the store and it was green, so I tried that! It was good!)
2 cups water(plus more for rinsing)
1 TBLSP sugar
1 TBLSP Rice Vinegar
1 1/2 tsp. Kosher Salt
Place rice in a bowl and rinse with cold water. Drain and repeat 2-3 times until water is clear.
Place 2 cups water and the rice into a pot and bring to a boil.

Once it starts boiling, turn heat to low and cover.
Simmer for 15 minutes.
Remove from heat and let stand covered for 10 minutes.
Combine the rice vinegar, sugar and salt in a small bowl and heat in the microwave for 30-45 seconds.
Transfer the rice into a large wooden or glass mixing bowl.
Add the vinegar mixture.
Fold thoroughly to combined and coat each grain of rice with the mixture.

Allow to cool at room temperature before using to make sushi.

For the veggies I am just using thinly sliced carrots and cucumbers. You can add other things like avocado, sprouts, tofu. Whatever you want.


Okay, now that you have the rice ready, you need to place a bamboo mat on the counter so it's like this!

I get my nori(seaweed) at Owajimaya.


Lay it on the sushi mat with the shiny side facing down.

Take a wooden spoon and spread some rice onto the nori. Make sure that it's even! Be sure to leave a little off the top edge so you can seal it.


Then, some vegetables about 1/4 of the way up the roll.


Start rolling it up. Keep it tight and straight.

As you roll the sushi the top of the mat should be perpendicular to the bottom half.


Once your to the end, lightly roll and press the end of the nori so that it sticks!


Now you have a sushi roll!


Now take a sharp knife and rub a little oil on it. Slice the ends off of the roll(and eat them as a snack).
Slice the roll into about 1" pieces.


Serve with soy sauce and wasabi for dipping!
Eat and enjoy!

Okinawan Purple Sweet Potato Haupia Pie

Okinawan Purple Sweet Potato Haupia Pie

Potato, saurekraut, cheese Pathivieir

Potato, saurekraut, cheese Pathivieir
School stuff, made my own sauerkraut too.

Decorative bread

Decorative bread
Made this in school

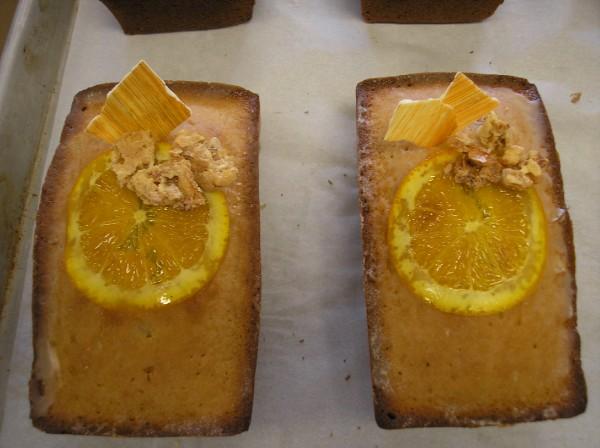
Orange butter tea cakes

Orange butter tea cakes
More school stuff